Advanced features
Introduction
This section will show you some advanced features of the jFed Experimenter GUI.
Proxy settings
One of the advanced features of jFed is the support of an SSH proxy for the following three problems:
- the APIs of testbeds typically use a lot of exotic TCP ports (12369, 12345, 3636, …). These ports are sometimes blocked by firewalls.
- some testbeds (e.g. Virtual Wall and w-iLab.t) expose the nodes only through IPv6 (because of shortage of public IPv4 addresses). If you are only on an IPv4 network, you cannot reach those nodes without an IPv6 tunnel.
- some nodes (e.g. Virtual Wall windows 7 images, Virtual Wall OpenVZ containers) might have only a private IPv4 address and be accessible only through a gateway (with a public IP address).
For all these cases, jFed has now SSH proxy support which can be enabled for the API calls or/and SSH connections.
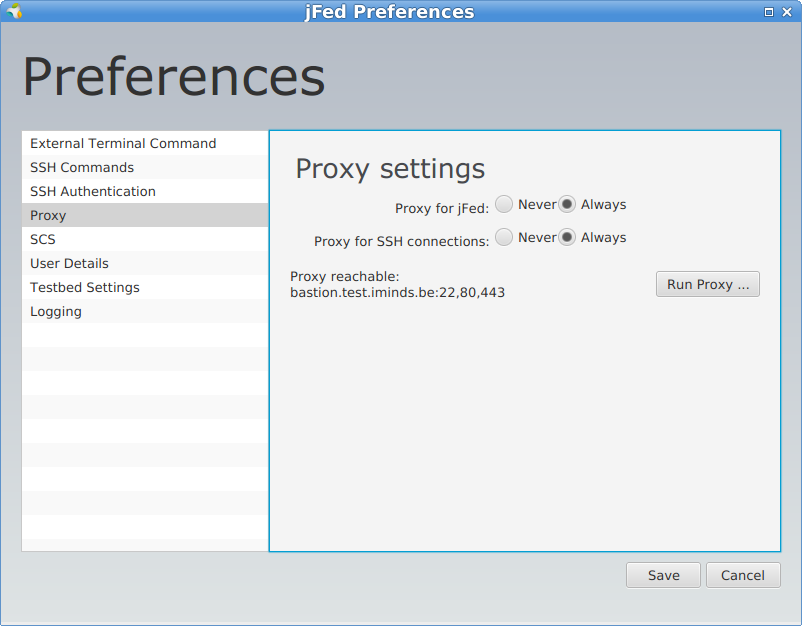
This can be enabled by going to the “General” tab, clicking “Preferences” and going to the “Proxy” settings.
The settings are labeled respectively Use Proxy for jFed and Proxy for SSH connections in the screenshot below.
Before you can tick Always you should click first Run Proxy Test.
If you cannot reach the proxy server, it makes no sense to use the proxy.
On windows, it is good to combine this with using the PuTTY SSH agent, this can also be set in the preferences.
Recover slices
If you have set up an experiment/slice, and you have terminated jFed, you can click the Recover button to fetch the information of old slices.
In this way you can again see the topology and login on the nodes if they are still up and running.
RSpec editor
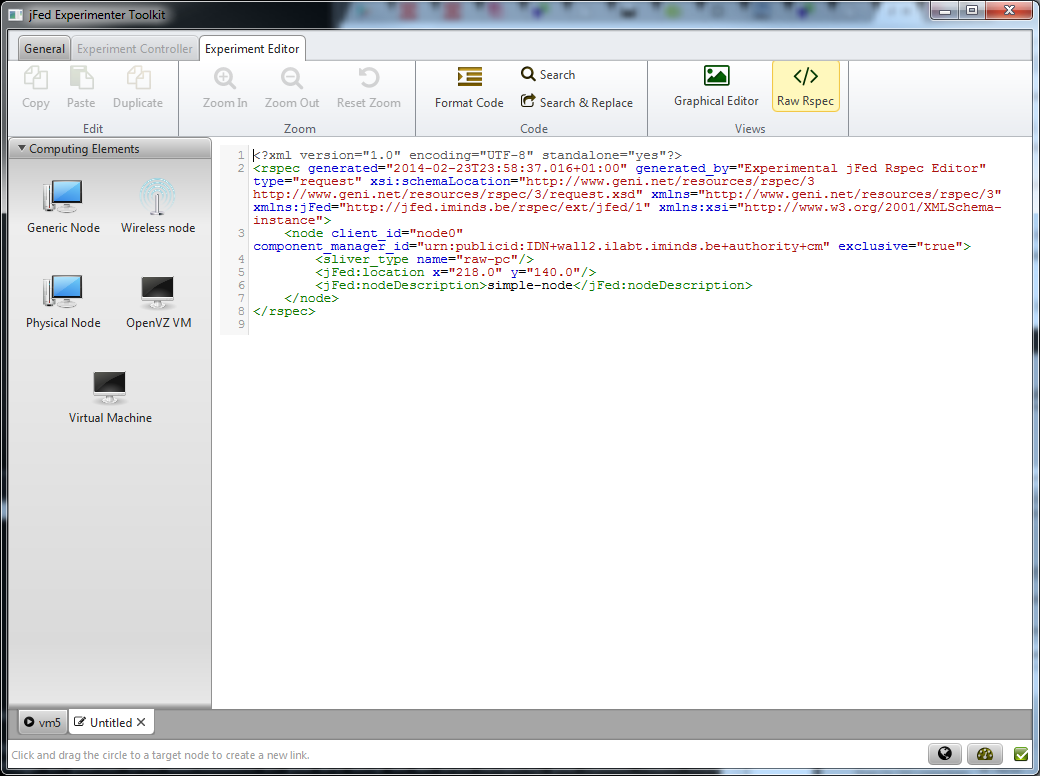
It is now possible to toggle between a graphical editor and a raw RSpec editor, which makes it possible to add extra information or to put in new RSpecs.
With the Format Code button you can optimise the XML view on the RSpec. With Search or Search & Replace you can enhance your edit. E.g. if you change all component_manager_id`s from
wall2.ilabt.iminds.be to emulab.net, your same experiment will run in Utah Emulab.
Openflow support
As we have now a raw RSpec editor, it has become possible to support RSpecs which are difficult to view graphically, e.g. openflow.
If you Open URL and fill in http://jfed.iminds.be/openflow.rspec, an openflow RSpec is loaded for the Virtual Wall openflow testbed and you can further edit it.
jFed supports sending the RSpec to the right Aggregate Manager.
See also http://fed4fire-testbeds.ilabt.iminds.be/ilabt-documentation/openflow.html.
Virtual wall advanced features
You can find the specific Virtual Wall advanced RSpecs at Virtual Wall RSpecs which make it possible to load other images, Windows 7, impairment on links, install software, and so on.
Adding extra ssh-keys to nodes
By default jFed will add the ssh-key that you specify in preferences, and the public ssh key extracted from your pem certificate.
However if you want to specify extra ssh-keys (e.g. of other users, or from yourself but on another device), you can do so as follows, by adding the following information in the RSpec (just before the closing rspec tag e.g.):
<jfed-ssh-keys:user-ssh-keys user="urn:publicid:IDN+wall2.ilabt.iminds.be+user+wvdemeer">
  <jfed-ssh-keys:sshkey>ssh-rsa AAAAB....  wim@tzu</jfed-ssh-keys:sshkey>
</jfed-ssh-keys:user-ssh-keys>
You can repeat both the internal sshkey (this will add multiple ssh-keys to the specified user) or the external user-ssh-keys so
you can specify multiple users.
If you omit the user part, then the ssh-keys will be added to the default user who created the experiment. The user unique identifier (URN)
depends on the authority you use, but for users of the Virtual Wall 2 authority, this always starts with urn:publicid:IDN+wall2.ilabt.iminds.be+user+ followed by your login name.
Caveats:
this is a jFed specific extension to the RSpec (it is interpreted and added as argument in the AM calls), so specify in the rpec header (jFed itself does this already for new experiments, but not if you import an old RSpec):
xmlns:jfed-ssh-keys="http://jfed.iminds.be/rspec/ext/jfed-ssh-keys/1"
you need a jFed compile r1138 or newer (http://jfed.iminds.be/releases/r1338/ : click Experimenter GUI - Launch webstart)
Support for subauthorities
When starting an experiment, automatically a list of your subauthorities/projects is shown and you can select one. This information can be used at testbeds to attach policies or quota based policies.

Ansible support
jFed supports ansible in two ways: either run ansible playbooks on your local PC (requires linux/MAC), or add a node to your experiment and run ansible from that node.
Local ansible support
Generate ansible inventory file from running experiment
You can generate an ansible inventory file from any running experiment. To do this, open the “Rspec Viewer” ribbon. Then click the “Save Experiment” button and select “Export Configuration Management Settings”. You then need to choose a location to store a zip file. The generated zip file contains ansible.cfg and the ansible inventory file. Note that in some cases, this file might contain your private key! So it is not a good idea to share this file.
Automatically run local ansible
Prerequisites: This will only work when ansible is locally installed (on linux/mac).
It is also possible to make jFed execute ansible playbooks, using the local ansible install, when the experiment is ready. To do this, add the execute_ansible_playbook element to the rspec:
<rspec ...>
   ...
   <jFed:execute_ansible_playbook xmlns:jFed="http://jfed.iminds.be/rspec/ext/jfed/1" source="https://example.com/playbook.yml" output_file="output.txt"/>
</rspec>
The source can be the path to a local file as well.
Remote ansible: Ansible node
Prerequisites: This feature expects Ansible to be installed on one of the nodes in the experiment, which can be achieved by using an install-script, or by embedding it in a custom disk-image.
jFed supports the automatic execution of Ansible playbooks on the ansible node in your experiment. This feature is included in jFed v5.7 and higher. These playbooks are launched when your experiment starts. The output of the playbook can be inspected in an extra “Ansible”-tab that will appear during the execution.
Feature: Waiting for install-scripts to complete
Some testbeds (like Virtual Wall 1&2, and other emulab-testbeds) have support for the automatic execution of install-scripts once a node has been provisioned. However, there is no feedback on when these scripts have finished. To prevent race-conditions (eg. trying to execute the ansible playbook before ansible has been installed on the host machine), an extra attribute jfed:finished_flag has been added to the execute-tag:
<services>
<install install_path="/local" url="http://doc.ilabt.iminds.be/jfed-documentation-5.7/_static/install-ansible.tar.gz" />
<execute shell="sh" command="cd /local && sudo /bin/bash install-ansible.sh"
jfed:finished_flag="/tmp/ansible-install-finished"/>
</services>
This attribute must contain the location of a file that will be created (touch-ed) at the end of the script. This way, jFed knows the script has finished executing, and can continue the provisioning process. An example of a script installing ansible can be found here.
Feature: Dynamic inventory generation
jFed can automatically generate an inventory file. To allow differentiation between nodes, you can use <jfed:ansible_group>-tags to add a node to one or more groups in the inventory.
For example:
<node client_id="serverA" exclusive="true" component_manager_id="urn:publicid:IDN+wall2.ilabt.iminds.be+authority+cm">
   <sliver_type name="raw-pc"/>
   <jfed:ansible_group name="server"/>
</node>
Will result in:
[server]
serverA  ansible_host=n063-17a.wall2.ilabt.iminds.be
This inventory file will be uploaded to the location specified in <jfed:ansible inventory="/MY/LOCATION">.
Feature: Executing an Ansible playbook
~~~^^^^^^^^^~~~~~~~~~~~~~~~~~~~~~~~~~~
To request the execution of an Ansible playbook, you must add a <jfed:ansible>-tag to the <services>-tag of a node.
This tag has the following arguments:
- galaxy-command: The command necessary to execute Ansible Galaxy. Defaults to
ansible-galaxy - install_requirements: A absolute path of a file containing all the ansible ‘roles’ to be installed by Ansible Galaxy
- inventory: The absolute path where jFed must upload the dynamically created files to
- playbook-command: The command necessary to execute Ansible Playbook. Defaults to
ansible-playbook. - execute_playbook: The absolute path to the playbook that must be executed by Ansible Playbook
- debug: request extra verbose output from Ansible (equivalent to executing ansible with
-v)
For example:
<jfed:ansible
       galaxy-command="sudo ansible-galaxy"
       install_requirements="/local/my_repo/playbooks/ansible-requirements.yml"

       inventory="/local/my_repo/playbooks/hosts"

       playbook-command="sudo ansible-playbook"
       execute_playbook="/local/my_repo/playbooks/main.yml"

       debug="true"
 />